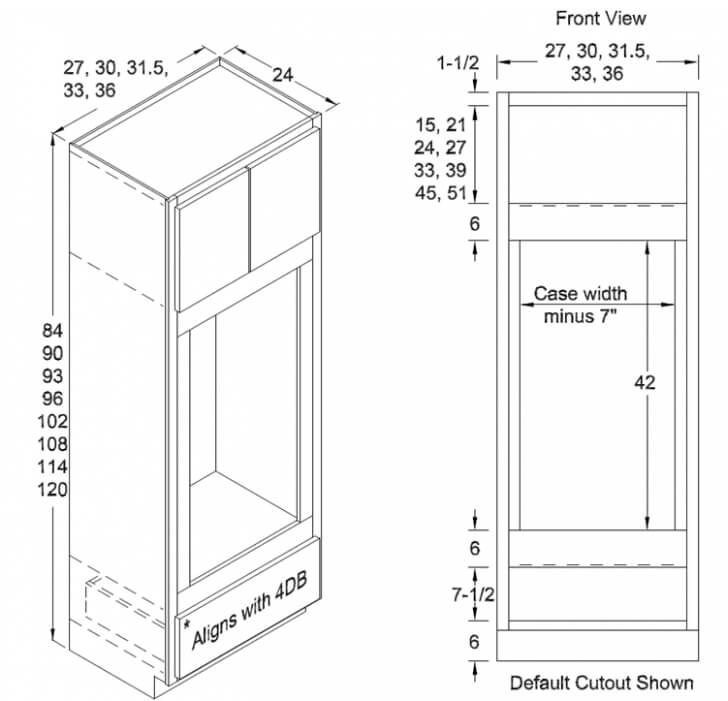
Kitchen design trends continue to remain strong in Transitional styling, however, over this past year I have noticed a small shift navigating towards Mid-Century Modern and soft Contemporary style in kitchen designs. Due to this shifting change towards more modern design features, you may have noticed more and more appliances are being integrated or hidden in kitchen designs. One terminology that you may have been hearing lately is Flush Inset Appliances.
What are Flush Inset Appliances?
What are Flush Inset Appliances you might ask? Recently, some appliance manufacturers are offering the choice of Standard or Flush Inset appliance installation options. In order to understand what Flush Inset appliances are, let’s discuss the difference between Standard Installation and Flush Inset Installation.
Standard Installation for Appliances
In a Standard Installation application, a unit such as a refrigerator or a wall oven will sit proudly or sit forward of the surrounding framed cabinetry, end (side) panels, or countertop. Some core features that you may notice in a standard installation application are:
-
In framed cabinetry, an oven, microwave, warming drawer, etc. will sit against the face frame of the cabinet box.
-
Standard Installation on framed cabinetry will have larger reveals around the appliance, meaning the face frame of the cabinet may be exposed or more visible.
-
The edges of the appliance or trim kit are exposed.
-
There can be limited flexibility in the placement of the appliance due to the manufacturer’s installation instructions.
-
Specific cut-outs are recommended to be specified or they can be trimmed or cut on the job site.
Below are a few photos displaying a Standard Installation appliance application.
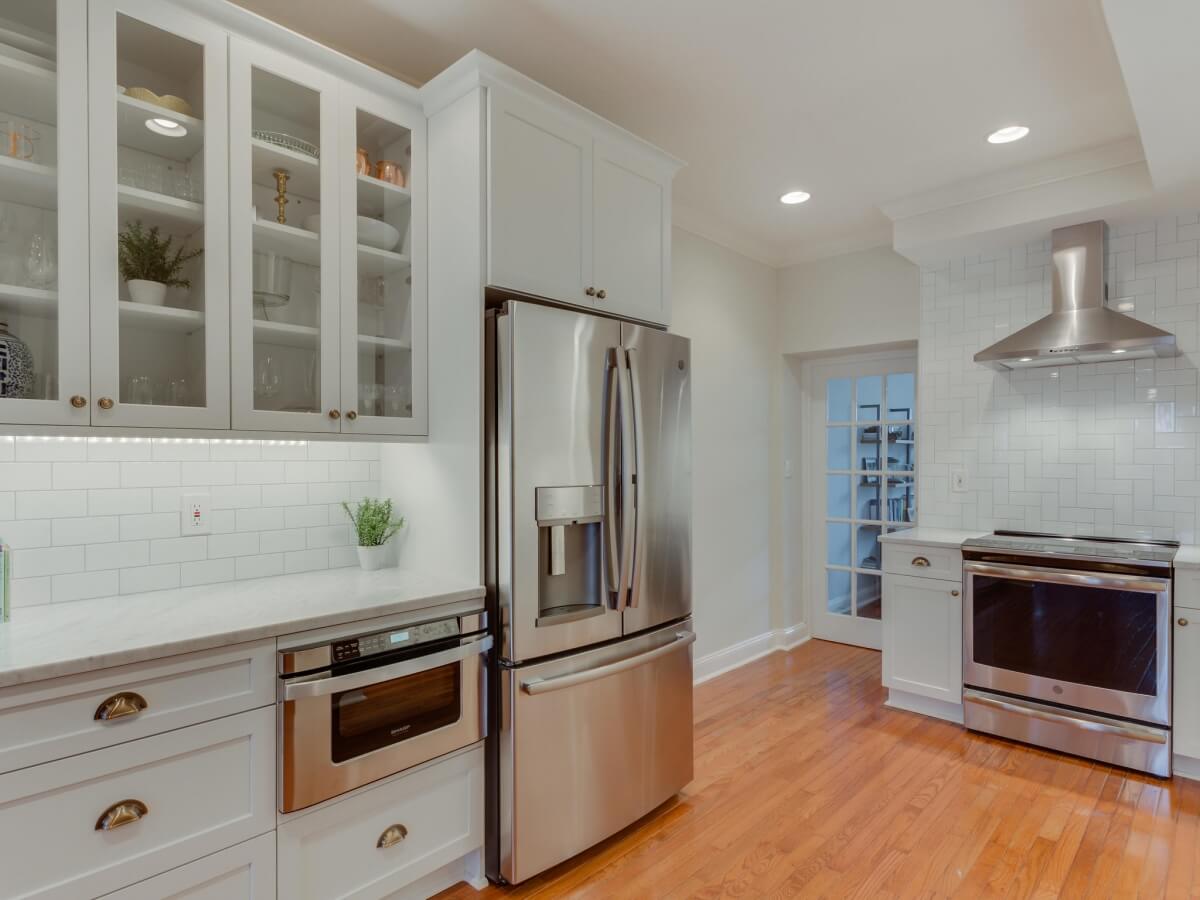
An example of a standard appliance installation for an under-counter microwave. Kitchen designed by Bath Plus Kitchen, Alexandria, Virginia.
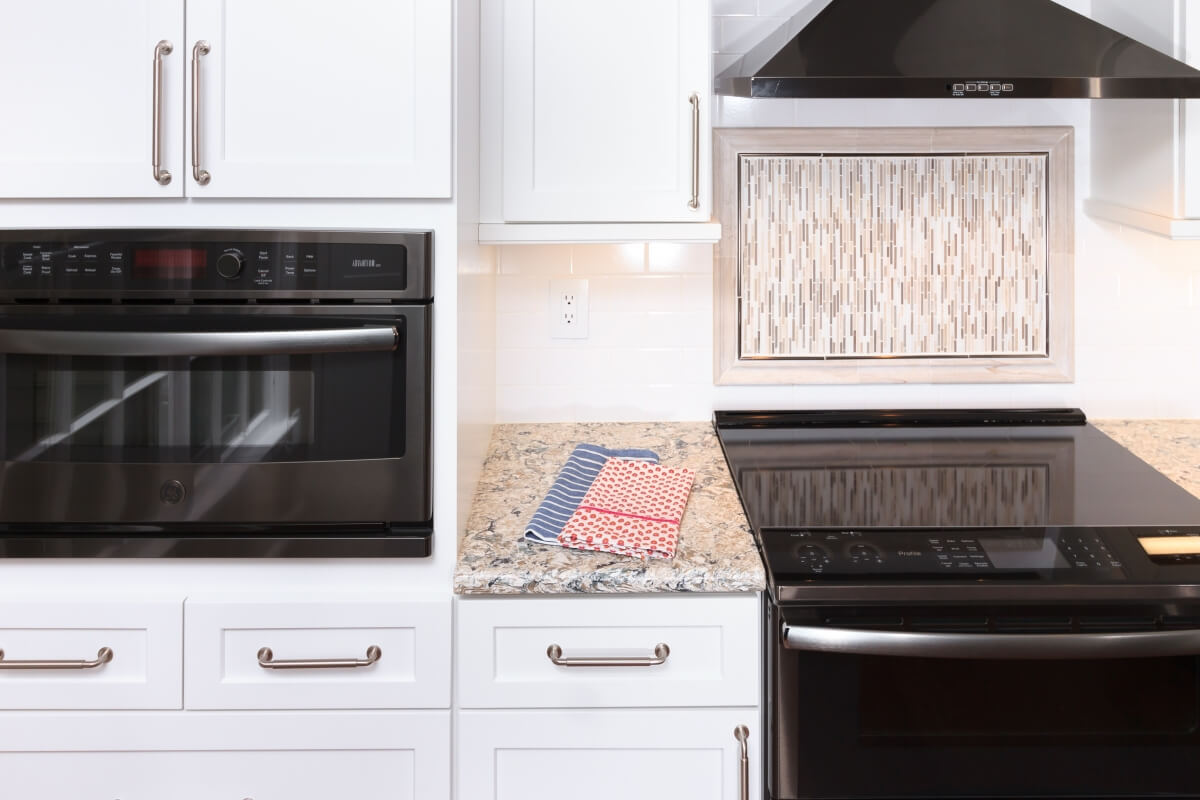
In framed cabinetry, an appliance such as an oven or a microwave will sit against the face frame of the cabinet box leaving some of the cabinetry face frame visible, as seen in this photo. Kitchen design by House to Home Solutions, Rockville, Maryland.
Flush Inset Installation for Appliances
In a Flush Inset Installation application (or Flush Install) primarily seen in frameless cabinetry, a unit such as a refrigerator or a wall oven sits flush, coplanar, or on the same plane as the surrounding frameless cabinetry, end (side panels), or countertop. (Please note if your appliance does not include any Flush Inset Installation specifications for your selected unit, then it cannot be installed in a Flush Inset application). Some core features that you may notice in a flush inset installation application are:
-
In frameless or inset cabinetry a refrigerator, oven, microwave, etc. will sit flush with the face frame of the cabinetry or side panels.
-
There are tighter reveals and very minimal gaps surrounding the kitchen appliance.
-
Edges of the kitchen appliance are concealed and flush with the surrounding cabinetry or panels.
-
Allows for flexibility of the appliance placement.
-
You can specify cut-outs in the cabinetry or design around the unit with separate cabinets.
-
It creates a nice clean linear appearance when the unit is coplanar with the adjacent cabinetry.
Here are a few photos highlighting flush install appliances:
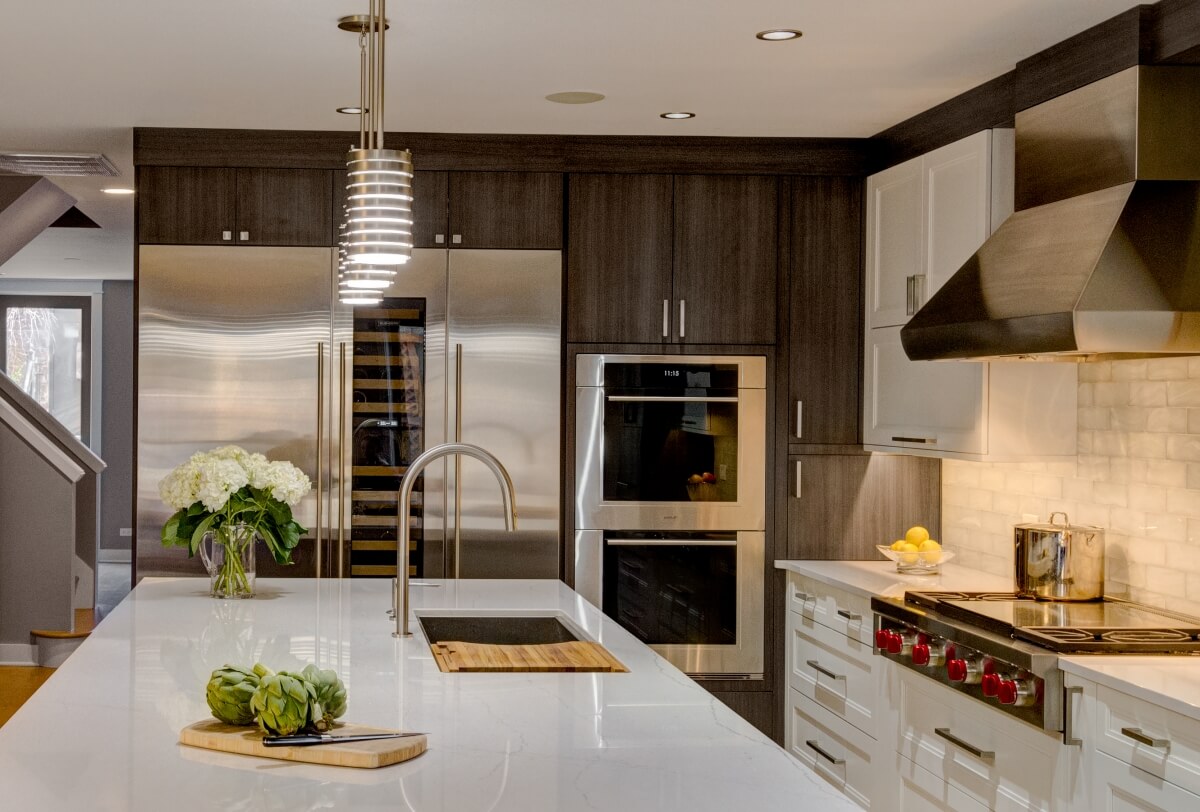
In Flush Inset appliance applications, appliances such as the refrigerator, oven, microwave, etc. will sit flush (coplanar) with the doors or end panels of the cabinets, as seen in this kitchen design.
The kitchen was designed by Kitchen Design Partners in Northbrook, Illinois. Additional credits include; Contractor Mahogany Builders, Interior Designer Ann Randall Designs, and Photographed by Dennis Jourdan Photo and Video Inc.
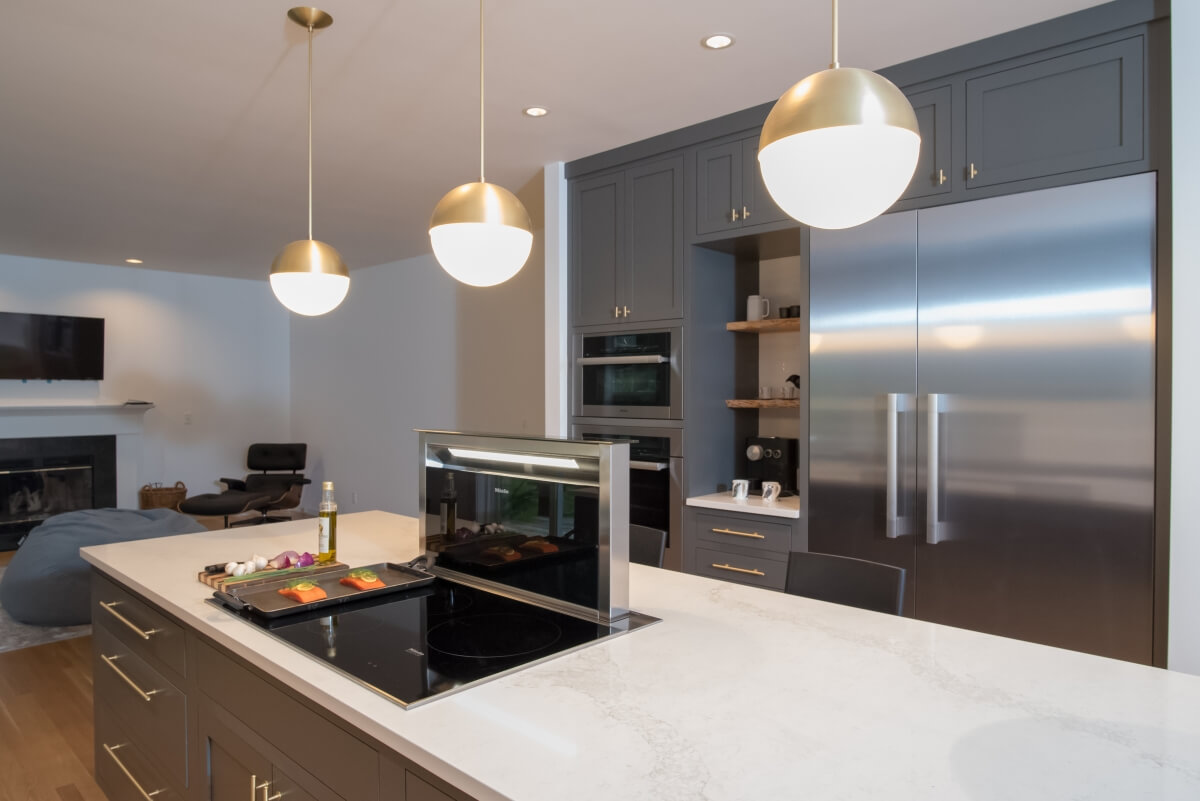
A beautiful example of Flush Inset appliances in Inset cabinetry. Kitchen design by Molly McCabe, AKBD, CLIPP, CGP, CAPS of McCabe by Design, LLC in Blainbridge Island, Washington.
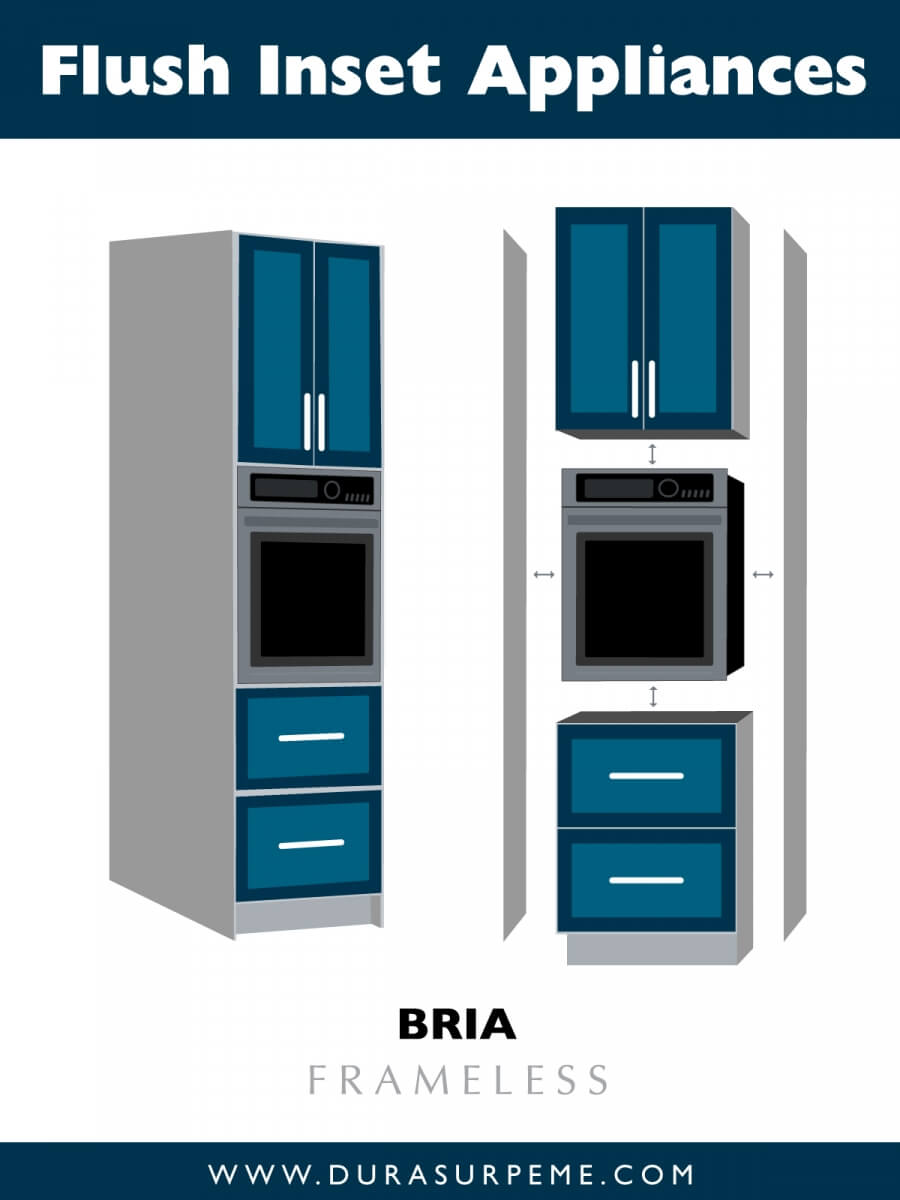
Below, this side-by-side comparison illustrates the difference between standard installations for oven units in framed cabinetry versus a flush inset application for oven units in frameless cabinetry.
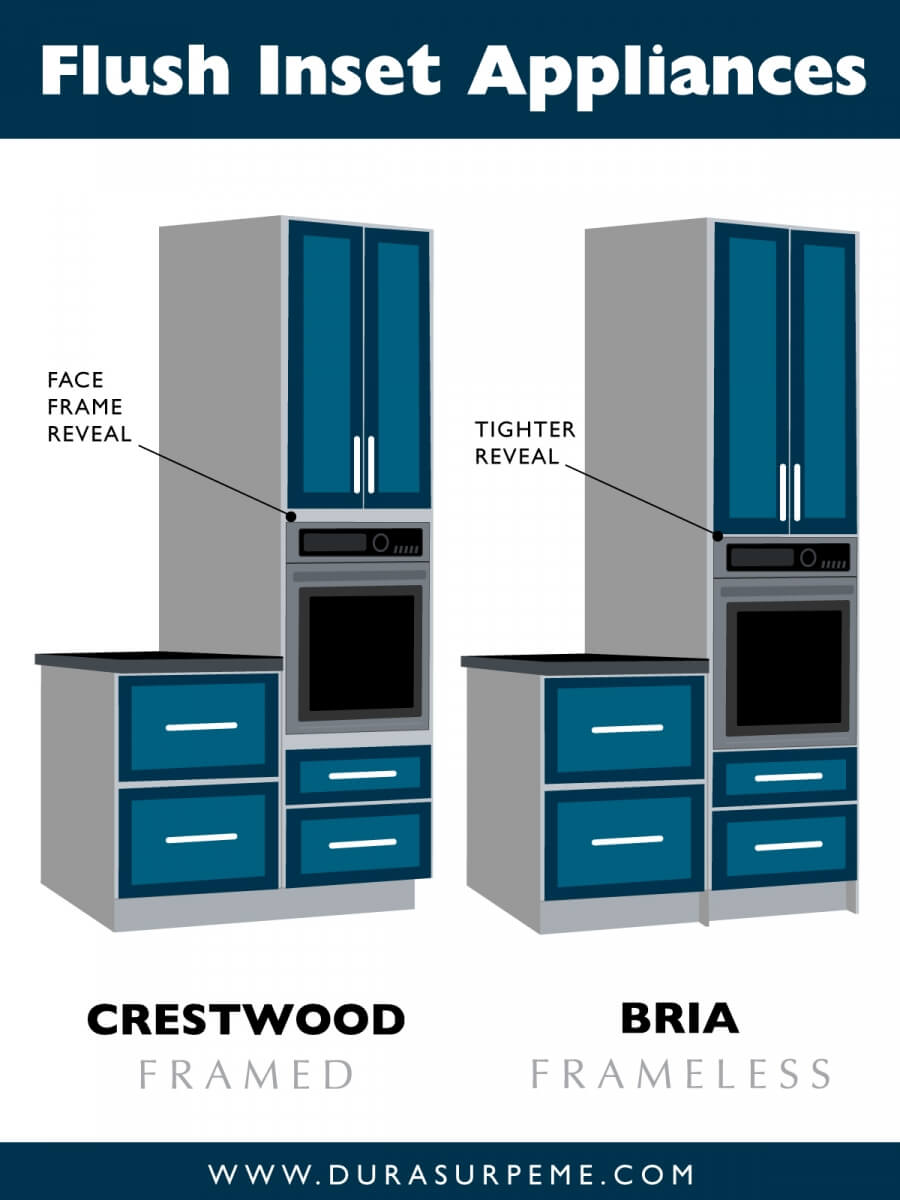
So, how can you achieve this Flush Inset installation look for your appliances in your kitchen design? While the concept sounds complicated and intimidating, it is actually quite achievable with a little practice. Here are a few tips and tricks to use when designing for flush inset oven appliances:
Framed and Inset Cabinetry Flush Inset Appliances
When using Dura Supreme Cabinetry’s Crestwood framed cabinetry product line, you can specify the required cutout opening size and depth of an appliance cabinet to create a seamless look that will allow the appliance to be flush with the face frame and doors of the cabinet.
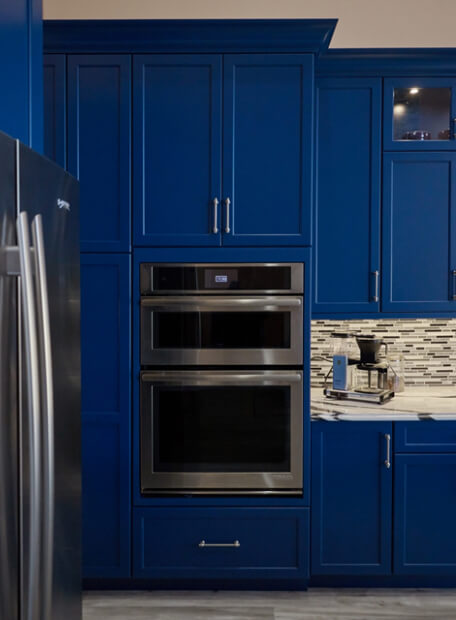
Kitchen design by Artistic Cabinetry, LLC in Smithtown, New York. Photo by HM Photography.
Frameless Cabinetry Flush Inset Appliances
When using Dura Supreme Cabinetry’s Bria frameless product line, you can also specify the required cutout opening size and depth of an appliance cabinet to create a flush inset appearance. However, there is another way to achieve flush inset installation without specifying an appliance cabinet in frameless cabinetry. An alternative method is enclosing the oven appliance between separate cabinets and end panels. For example, in this graphic, the oven is sitting on top of a two-drawer base, under a deep wall cabinet with end (side) panels enclosing all the separate parts. Separate finished filler pieces are used as cleats to secure and attach the oven appliance to the adjacent cabinets and panels. When ordering the tall end (side) panels, plan to order them deeper than the oven and cabinets so that the panels will sit flush with the face of the cabinetry doors and oven appliance – thus creating a flush inset appearance. This will also allow the countertop to end flush against the cabinet panel so that it creates a clean flush appearance on all planes.
When using this method for flush inset appliances, it is recommended to finish the bottom of your upper cabinet and finish the top of your base cabinet to ensure that there is no unfinished cabinet visible when the oven appliance door is open.
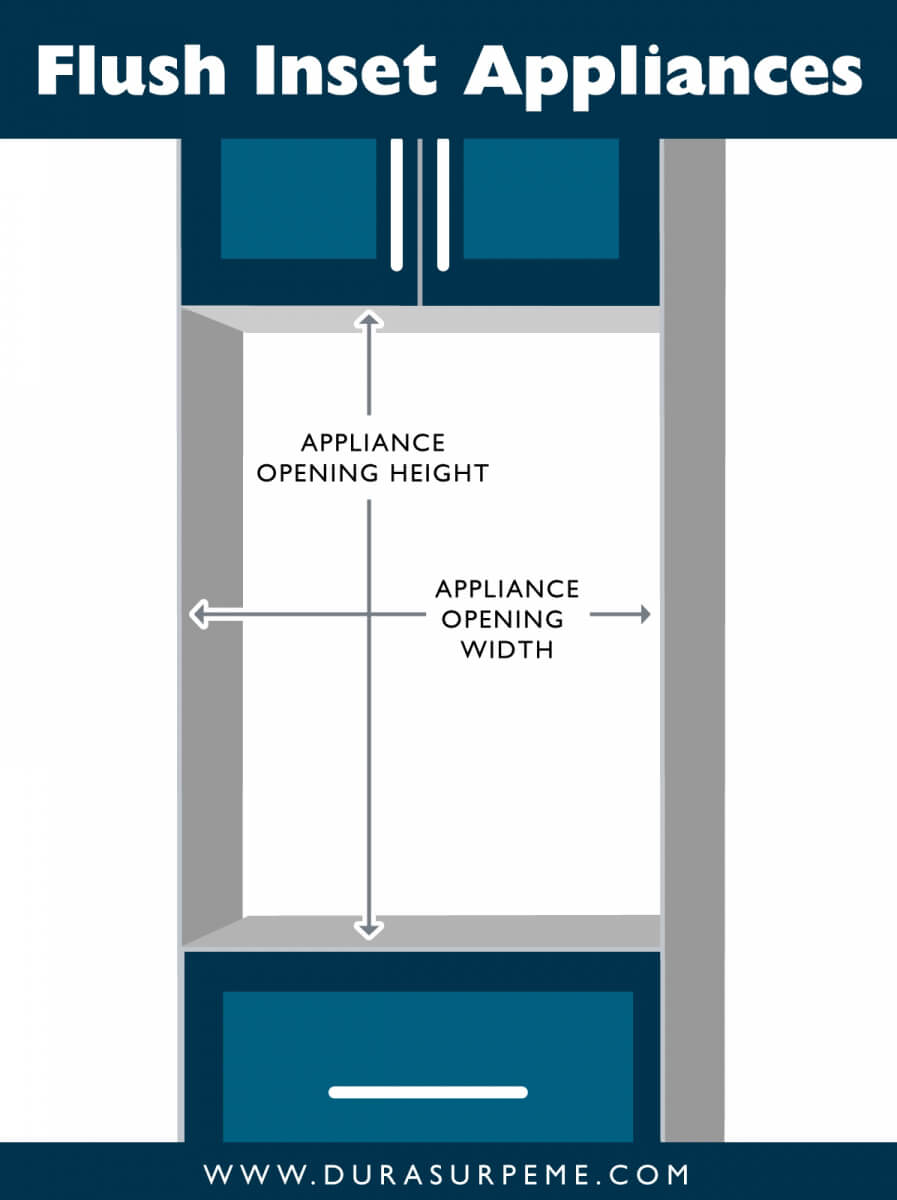
In the image above, the appliance opening you would specify for Flush Inset Installation is the manufacturer’s requirements for the opening height and width for flush inset installation. When using this method for flush inset appliances, it is recommended to finish the bottom of your upper cabinet and finish the top of your base cabinet to ensure that there is no unfinished cabinet visible when the oven appliance door is open
The appliance opening you would specify for flush inset installation is the manufacturer’s requirements for the opening height and width for flush inset install. Be sure to check the manufacturer’s specifications closely, because the opening requirement for flush inset installs is larger than a standard install application since you are enclosing the entire front of the appliance. Below is a great example of using the alternative method for designing for flush inset appliances in frameless cabinetry. Notice how the oven units and cabinets are stacked on top of each other and finished by using simple end panels to enclosed the pieces. Thus, creating a flush, seamless appearance.
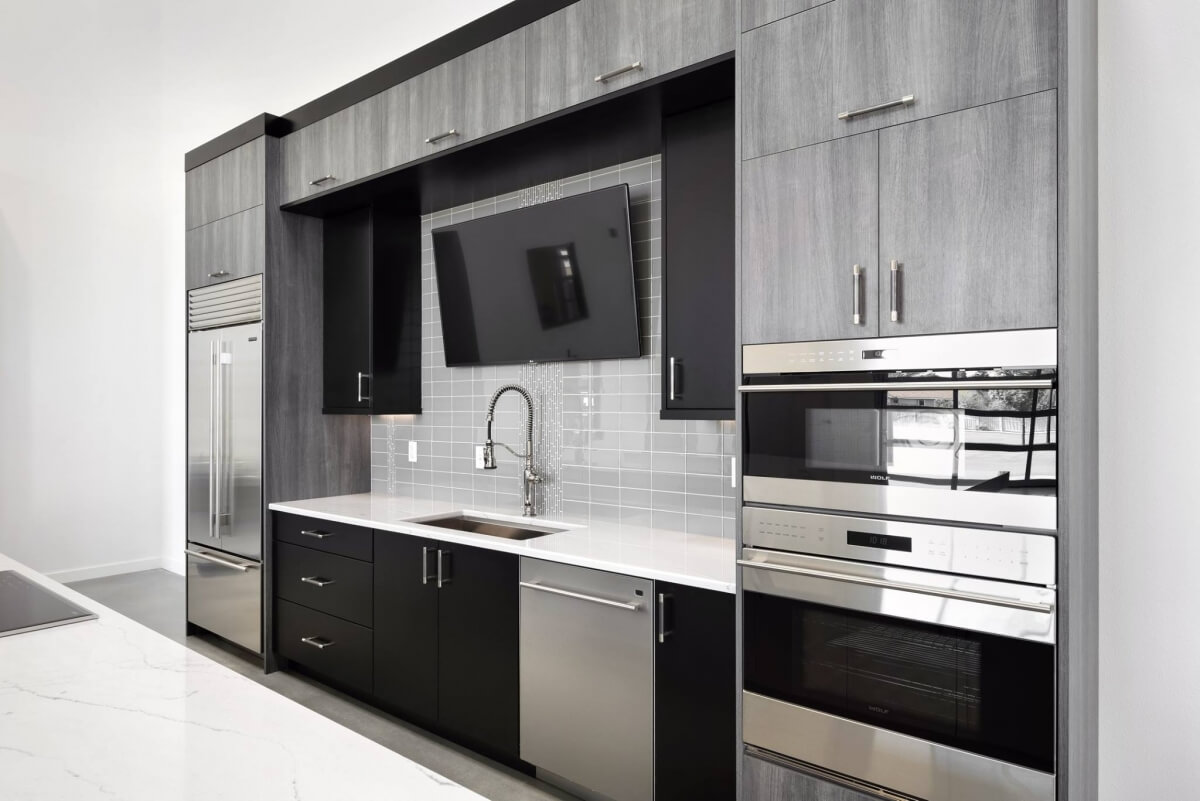
Contemporary kitchen design featuring Flush Inset appliances. Designed by Russell Fogle of 1st Choice Cabinetry, Inc. in Boise, Idaho. Photographed by Greg Scott Photography.
This method can also be achieved in inset cabinetry applications as well by using adjacent cabinetry as the sides of the unit surrounding the kitchen appliance, like in the photo below.
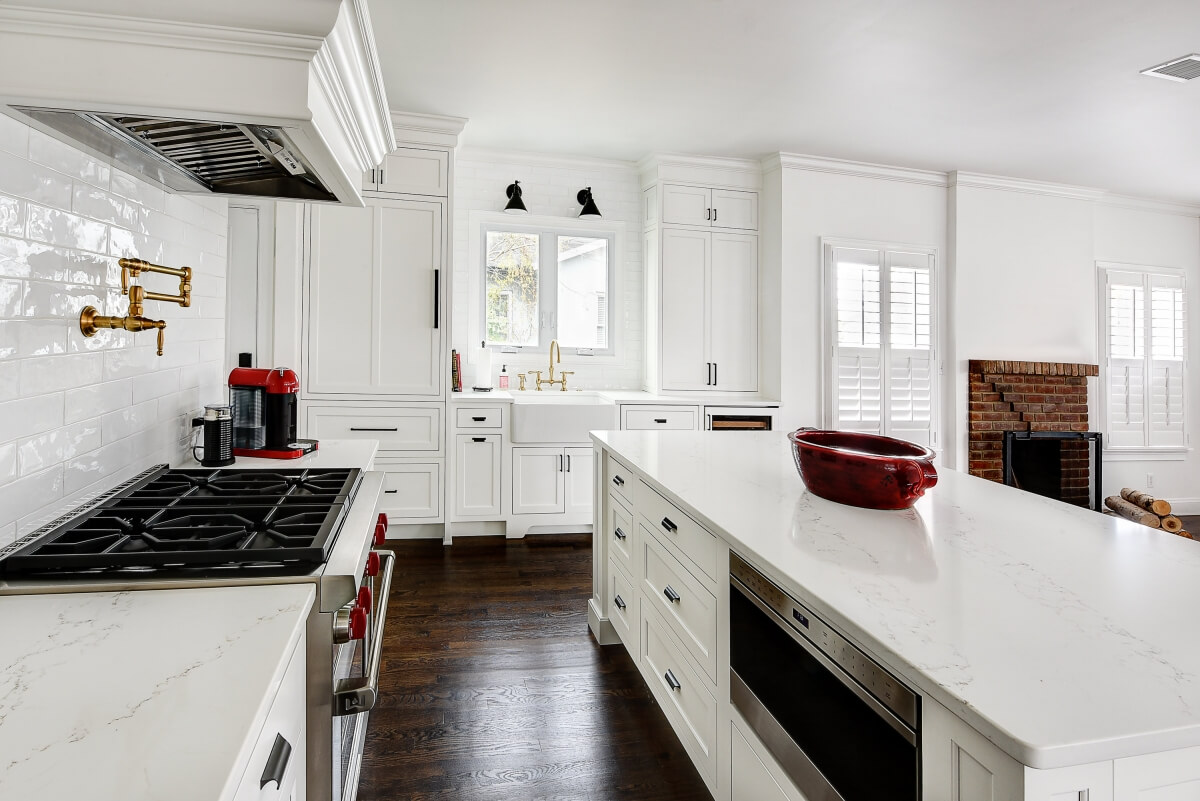
A stunning white Inset kitchen design featuring Flush Inset appliances. Designed by Erica Caserta of Showcase Kitchens, LLC in Canton, Connecticut; Photographed by Severine Photography.
Now that I have shared this simple alternative method with you on how to design for Flush Inset appliances, I hope that it will not seem as intimidating to create this beautiful contemporary look in your kitchen design. Talk to your local Dura Supreme Kitchen Designer to learn more about the options for combining cabinets and appliances.

